
How do you use the snipping tool on a mac if there is no app officially called “Snipping Tool” in macOS? The simple answer is that Mac has its own built-in Screenshot tool, which works like the Windows Snipping Tool and lets you capture the full screen, a selected area, one window, or even record your screen.
For most users, the fastest Mac Snipping Tool shortcut is Shift + Command + 4. This lets you drag over part of the screen and take a custom snip. If you want more options, use Shift + Command + 5 to open the Screenshot Toolbar, where you can choose screenshot modes, screen recording options, save locations, timers, and more.
This guide explains exactly how to use the snipping tool on Mac, where your screenshots go, how to copy a snip to the clipboard, how to edit screenshots with Markup and Preview, and what to do if your Mac screenshot shortcut is not working.
Does Mac Have a Snipping Tool?
Mac does not have a Windows-style app named Snipping Tool, but it does have built-in screenshot features that do the same job. Apple calls this feature the Screenshot tool or Screenshot Toolbar, depending on how you open it.
If you are a Windows user switching to a MacBook, this can feel confusing at first. On Windows, you may search for the Windows Snipping Tool from the Start menu. On Mac, you usually use keyboard shortcuts for screenshots instead. These shortcuts are built into macOS, so you do not need to download a separate app for basic snipping.
The Mac equivalent of Snipping Tool includes several built-in options:
| Task | Mac Tool |
| Capture the full screen | Shift + Command + 3 |
| Capture part of the screen | Shift + Command + 4 |
| Capture one window | Shift + Command + 4, then Space |
| Open screenshot options | Shift + Command + 5 |
| Edit a screenshot | Markup or Preview |
So, while there is no app named Snipping Tool for Mac, the Mac screenshot tool gives you almost everything most people need: selected screenshots, full-screen captures, window screenshots, clipboard copying, screen recording, and basic editing.
Quick Mac Snipping Tool Shortcut Table
If you only need the shortcut, this table gives you the fastest answer. These Mac screenshot shortcuts work on most modern Mac devices, including MacBook Air, MacBook Pro, and iMac.
| What You Want to Do | Mac Shortcut |
| Capture the full screen | Shift + Command + 3 |
| Capture part of the screen | Shift + Command + 4 |
| Capture one window | Shift + Command + 4, then press Space |
| Open the Screenshot Toolbar | Shift + Command + 5 |
| Copy selected area to clipboard | Control + Shift + Command + 4 |
| Copy full screen to clipboard | Control + Shift + Command + 3 |
The most useful shortcut for snipping is Shift + Command + 4. It turns your cursor into crosshairs, so you can drag over the exact area you want to capture.
If you want a visual menu with more snipping options, use Shift + Command + 5. This opens the Screenshot Toolbar, where you can choose Capture Entire Screen, Capture Selected Window, Capture Selected Portion, Record Entire Screen, or Record Selected Portion.
How to Snip Part of the Screen on a Mac
To snip part of the screen on Mac, use Shift + Command + 4. This is the closest built-in shortcut to the classic Windows Snipping Tool.
Here is how to capture a selected portion of the screen:
- Press Shift + Command + 4.
- Your cursor will turn into a crosshair cursor.
- Click and drag across the part of the screen you want to capture.
- Release your mouse or trackpad.
- The screenshot will be saved automatically, usually to the Desktop.
This method is best when you want to capture a custom area screenshot, such as a small part of a webpage, an error message, a chart, a form, a message, or a section of an app.
After taking the snip, you may see a floating thumbnail preview in the bottom-right corner of your screen. You can click it quickly to open editing tools. This is useful if you want to crop, draw, add text, or use Markup before saving the final screenshot.
A simple example: imagine you are working remotely and need to send a screenshot of a software bug to your team. Instead of capturing your entire screen, you can press Shift + Command + 4, drag around only the bug area, and share a clean, focused image.
How to Capture the Full Screen on Mac
To capture the full screen on Mac, press Shift + Command + 3. This instantly takes a screenshot of everything visible on your screen.
This option is useful when you want to capture a full desktop view, dashboard, website page, online class screen, software layout, or full error message. If you use multiple displays, macOS may capture each display separately, depending on your setup.
The full-screen screenshot usually saves as an image file on your Desktop. By default, Mac screenshots are commonly saved as PNG files, although advanced users can change the screenshot file format later using system commands.
Use full-screen capture when the whole visual context matters. For example, if you are explaining a workflow in a tutorial, showing the full screen can help the reader understand where everything is located. But if you only need one small section, Shift + Command + 4 is usually cleaner.
How to Capture One Window on Mac
To capture one window on Mac, use Shift + Command + 4, then press Space. This method lets you take a clean screenshot of a single app window without manually dragging around it.
Here is the process:
- Press Shift + Command + 4.
- Press the Space bar.
- Move your cursor over the window you want to capture.
- Click the selected window.
- Mac will save the window screenshot.
This is especially helpful for creating tutorials, help documents, software guides, product screenshots, and customer support instructions. Instead of showing your entire desktop, you can capture only the active application window.
Mac window screenshots may include a soft shadow effect around the window. This often looks polished, especially for documentation or blog posts. However, if you want a flatter image without shadow, you may need advanced settings or a third-party screenshot app.
The window capture method is one of the most useful Mac screenshot shortcuts because it gives you a cleaner result than a full-screen capture and requires less manual precision than dragging a selected area.
How to Open and Use the Screenshot Toolbar on Mac
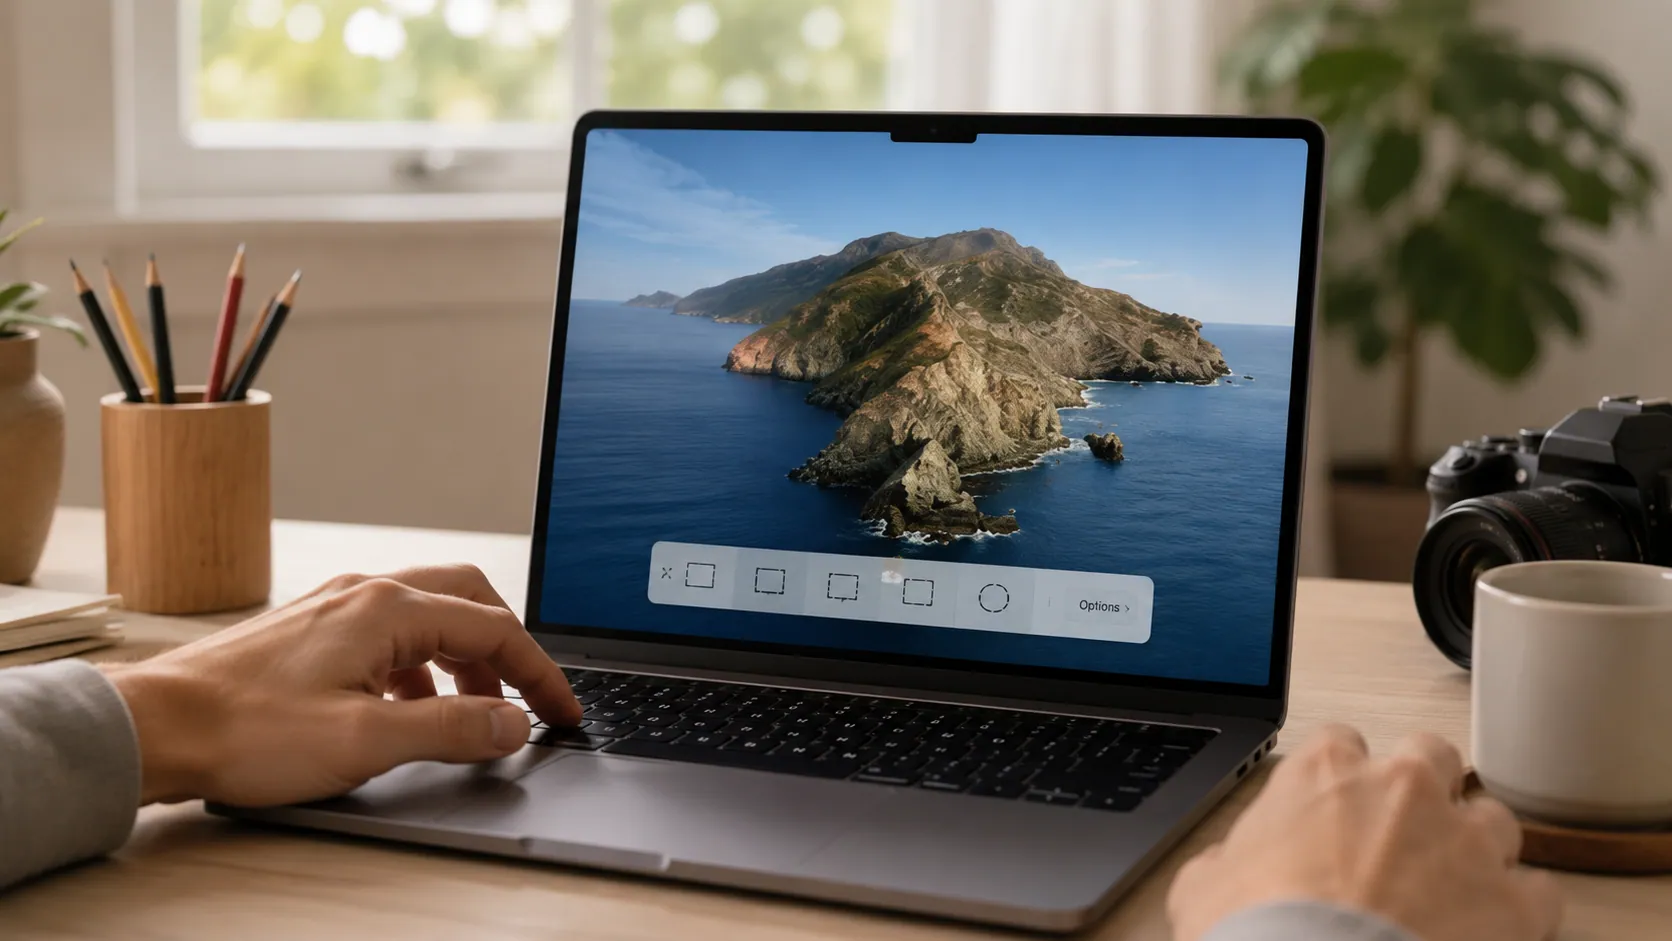
The Screenshot Toolbar is the closest thing to a full Snipping Tool on Mac interface. To open it, press Shift + Command + 5.
When the toolbar appears, you will see several capture and recording options:
| Screenshot Toolbar Option | What It Does |
| Capture Entire Screen | Takes a screenshot of the full screen |
| Capture Selected Window | Captures one window |
| Capture Selected Portion | Lets you drag and capture a custom area |
| Record Entire Screen | Records everything on the screen |
| Record Selected Portion | Records only a selected area |
The Screenshot Toolbar also includes an Options menu. This is where you can control important settings such as Save To, timer delay, microphone recording, floating thumbnail, and whether to show the mouse pointer.
For example, if you want a delayed screenshot, open Shift + Command + 5, click Options, then choose 5 seconds or 10 seconds. This is helpful when you need time to open a menu, hover over a tooltip, or prepare your screen before the screenshot is taken.
The Save To option is also important. It lets you choose whether screenshots go to the Desktop, Documents folder, Clipboard, Mail, Messages, Preview, or another folder.
For many users, Shift + Command + 5 is the best way to use the Mac screenshot tool because it combines screenshots, screen recording, timer settings, and save-location controls in one place.
How to Copy a Screenshot to Clipboard Without Saving It
Sometimes you do not want to save a screenshot as a file. You only want to copy it and paste it into an email, document, chat, or project tool. Mac lets you do this with a clipboard shortcut.
To copy a selected area to the clipboard, press:
Control + Shift + Command + 4
Then drag over the area you want to capture. Instead of saving the screenshot to your Desktop, Mac copies it to the clipboard. You can then paste it using Command + V.
To copy the full screen to the clipboard, press:
Control + Shift + Command + 3
This workflow is very useful when you want to paste a screenshot directly into:
- Google Docs
- Slack
- Notion
- Trello
- Messages
- Support tickets
- Online forms
For example, if you are writing a tutorial in Google Docs, you can press Control + Shift + Command + 4, select the part of the screen you need, then paste it directly into the document. This avoids cluttering your Desktop with extra screenshot files.
This is one of the most useful but often overlooked Mac Snipping Tool shortcut options.
Where Do Screenshots Go on Mac?
By default, Mac screenshots usually save to the Desktop. If you take a screenshot and cannot find it, check your Desktop first. The file name often includes the word “Screenshot” followed by the date and time.
If your screenshots are not on the Desktop, the save location may have been changed. To check or change it:
- Press Shift + Command + 5.
- Click Options.
- Look under Save To.
- Choose Desktop, Documents, Clipboard, Mail, Messages, Preview, or another location.
This solves one of the biggest beginner problems: “Where are my screenshots saved on a Mac?”
If your screenshots seem missing, also check your Documents folder, Downloads folder, or any custom destination folder you recently used. If you selected Clipboard, the screenshot will not appear as a saved file. It is copied temporarily and needs to be pasted somewhere with Command + V.
A helpful habit is to create a folder called “Screenshots” and set it as your preferred directory. This keeps your Desktop clean and makes it easier to organize screenshots for work, school, blog posts, or customer support.
How to Edit, Crop, and Mark Up Screenshots on Mac
After taking a screenshot, Mac gives you simple editing tools through Markup and Preview. These tools are useful if you want to crop a screenshot, add arrows, highlight a detail, or cover private information.
The fastest way to edit is to click the floating thumbnail preview that appears after you take a screenshot. This opens the screenshot in a quick editing window. From there, you can use Markup tools to add text, arrows, shapes, highlights, pens, and freehand drawings.
You can also open a saved screenshot in Preview. Preview is a built-in Mac app that lets you crop, resize, rotate, annotate, and export images. It is especially helpful for basic screenshot editing.
Common editing tasks include:
| Editing Task | Best Tool |
| Crop extra space | Markup or Preview |
| Add arrows | Markup |
| Add text labels | Markup |
| Highlight an area | Markup |
| Resize image | Preview |
| Export as another format | Preview |
If your screenshot includes personal details, passwords, addresses, private messages, or account information, always hide that information before sharing. Some users blur sensitive information, while others cover it with a shape or solid block. This is a simple but important privacy and security habit.
How to Record Your Screen with the Mac Screenshot Tool
The Mac Screenshot Toolbar is not only for screenshots. It can also record your screen. To use it, press Shift + Command + 5.
You will see two screen recording options:
| Recording Option | What It Does |
| Record Entire Screen | Records the whole screen |
| Record Selected Portion | Records only the area you choose |
If you want to record with audio, click Options and choose your microphone under the microphone settings. This is useful for voiceover explanations, software demos, online tutorials, online classes, and bug reports.
For example, if you are trying to show a support team how an error happens, a short screen recording can be more helpful than a still screenshot. You can choose Record Selected Portion, drag around the app area, and record only the problem.
To stop recording, click the stop button in the menu bar. The recording will usually save to your selected location. Depending on your macOS settings and workflow, screen recordings may be saved in video formats such as MOV or handled through compatible video tools.
This feature makes Shift + Command + 5 more powerful than a basic snipping shortcut because it combines screenshots and screen recording in one built-in utility.
How to Use the Snipping Tool on MacBook Air, MacBook Pro, or iMac
The same snipping shortcuts work across most Mac devices. Whether you use a MacBook Air, MacBook Pro, or iMac, the basic process is the same.
Use:
- Shift + Command + 4 to snip part of the screen
- Shift + Command + 3 to capture the full screen
- Shift + Command + 5 to open the Screenshot Toolbar
- Control + Shift + Command + 4 to copy a selected snip to the clipboard
If you use an external keyboard with your iMac or MacBook, the key labels may look slightly different, but the shortcut is still based on Shift, Command, and sometimes Control.
Some older MacBook Pro models include a Touch Bar or Control Strip. If screenshot controls have been added there, you may be able to access capture tools from the Touch Bar. However, keyboard shortcuts are still the most reliable and universal method.
So if you are searching for how to snip on MacBook Air, how to snip on MacBook Pro, or Snipping Tool MacBook, the answer is the same: use the built-in macOS screenshot shortcuts.
What to Do If the Mac Snipping Tool Shortcut Is Not Working
If your Mac screenshot shortcuts are not working, start with the simple fixes first. Many problems come from changed keyboard settings, shortcut conflicts, save-location confusion, or low storage space.
First, check that screenshot shortcuts are enabled:
- Open System Settings.
- Go to Keyboard.
- Open Keyboard Shortcuts.
- Choose Screenshots.
- Make sure the screenshot shortcuts are checked.
If Shift + Command + 4 is not working, another app may be using the same shortcut. Some third-party screenshot tools, screen recorders, clipboard managers, or productivity apps can create keyboard shortcut conflicts.
If the shortcut seems to work but no file appears, check the Save To location in the Screenshot Toolbar. Your screenshot may be saving to another folder, or it may be copied to the clipboard instead of saved as a file.
Also check your available storage. If your Mac has insufficient disk space, screenshots may fail to save properly. Restarting your Mac can also fix temporary issues with the screenshot system.
For advanced troubleshooting, some users reset screenshot settings with Terminal commands such as:
defaults delete com.apple.screencapture
killall SystemUIServer
Only use Terminal if you are comfortable with system commands. For most users, checking Keyboard Shortcuts, restarting the Mac, and confirming the save location will solve the issue.
Best Snipping Tool Alternatives for Mac
Most people do not need a third-party Snipping Tool alternative because the built-in Mac screenshot tool is already strong. It can capture the full screen, selected windows, selected portions, clipboard screenshots, and screen recordings.
However, a third-party app may be useful if you need advanced features such as scrolling screenshots, polished product images, cloud sharing, team collaboration, GIF creation, advanced annotation, or faster editing workflows.
Here are some popular Snipping Tool alternatives for Mac:
| Tool | Best For |
| CleanShot X | Polished screenshots, advanced workflows, and product visuals |
| Shottr | Lightweight screenshots and scrolling capture |
| Snagit | Professional tutorials, documentation, and training content |
| Lightshot | Simple screenshots and quick sharing |
| Monosnap | Cloud sharing and annotation |
| Skitch | Basic annotation and quick visual notes |
| Xnapper | Clean product-style screenshots |
A good rule is simple: use the built-in Mac Screenshot tool first. If you only need to capture, copy, save, crop, or mark up screenshots, macOS already gives you enough. Consider a third-party app only if you need advanced editing, scrolling capture, branded screenshots, or team sharing.
Mac Snipping Tool FAQs
What is the Mac equivalent of Snipping Tool?
The Mac equivalent of Snipping Tool is the built-in Screenshot Toolbar and macOS screenshot shortcuts. Use Shift + Command + 4 for selected-area snips and Shift + Command + 5 for the full screenshot menu.
What is the shortcut for Snipping Tool on Mac?
The most common Mac Snipping Tool shortcut is Shift + Command + 4. It lets you drag and capture a selected portion of the screen. For the full Screenshot Toolbar, use Shift + Command + 5.
How do I snip only part of my Mac screen?
Press Shift + Command + 4, then drag the crosshair cursor over the area you want to capture. Release your mouse or trackpad to take the screenshot.
Can I paste a Mac snip directly into an email or document?
Yes. Press Control + Shift + Command + 4, select the area, then paste it with Command + V into email, Google Docs, Slack, Notion, or another app.
Can I use Mac Snipping Tool without downloading an app?
Yes. You do not need to download anything for basic screenshots. macOS includes a built-in Screenshot utility with shortcuts for full-screen screenshots, selected-area captures, window captures, clipboard screenshots, and screen recording.
Why are my Mac screenshots not saving?
Your screenshots may be saving somewhere other than the Desktop. Press Shift + Command + 5, click Options, and check Save To. Also check your storage space and make sure screenshot shortcuts are enabled.
Can Mac take scrolling screenshots?
macOS does not offer a full built-in scrolling screenshot tool for every app. For scrolling screenshots, you may need third-party tools such as Shottr, CleanShot X, or Snagit, depending on your workflow.
What file format do Mac screenshots use?
Mac screenshots commonly save as PNG files by default. Advanced users can change screenshot formats to options such as JPG, JPEG, or other supported formats using system settings or Terminal-based workflows.
Conclusion: The Fastest Way to Snip on Mac
The fastest way to use the snipping tool on Mac is to press Shift + Command + 4, drag over the area you want, and release to capture it. If you want more options, press Shift + Command + 5 to open the Screenshot Toolbar, where you can capture the full screen, one window, a selected portion, or record your screen.
For quick copying, use Control + Shift + Command + 4 to send the snip to your clipboard instead of saving it as a file. For editing, use Markup or Preview.
Mac may not have a Windows app named Snipping Tool, but the built-in Mac screenshot tool gives most users everything they need to snip, save, copy, edit, and share screenshots easily.
Disclaimer: This article is for general informational and educational purposes only. macOS features, keyboard shortcuts, screenshot settings, and interface options may vary depending on your Mac model and macOS version. Third-party screenshot tools, accessibility settings, or custom keyboard shortcuts may also affect how screenshot and screen-recording features work.