
How do you check the oil in a car? The simple answer is: park your vehicle on level ground, turn the engine off, wait a few minutes, pull out the oil dipstick, wipe it clean, reinsert it fully, pull it out again, and read the engine oil level between the low and high marks.
Checking engine oil is one of the easiest parts of car maintenance, but it is also one of the most important. Your engine needs oil to lubricate moving parts, reduce friction, control heat, and protect against engine wear. If the oil level gets too low, your car may suffer poor engine performance, overheating, expensive repairs, or even engine failure.
The good news is that you do not need to be a mechanic to check your oil. With a clean rag, a few minutes, and the right steps, almost any driver can do it safely.
Quick Answer: How Do You Check the Oil in a Car?
To check oil in a car, make sure the vehicle is parked on a flat surface. Turn the engine off and let the oil settle. Open the hood, find the engine oil dipstick, pull it out, wipe it clean with a paper towel or rag, push it back into the dipstick tube, and pull it out again. The oil should sit between the MIN and MAX marks, two pinholes, or the crosshatched area on the dipstick.
If the oil is below the minimum mark, the engine may need more motor oil. If it is above the maximum mark, the engine may be overfilled, which can also cause problems. If the oil looks milky, gritty, very thick, or smells burnt, the car may need more than a simple oil top-up.
Here is the basic process:
- Park on level ground.
- Turn off the engine.
- Wait a few minutes.
- Open the hood.
- Locate the oil dipstick.
- Wipe it clean.
- Reinsert it fully.
- Pull it out again and read the level.
- Add oil only if needed.
Tools You Need Before Checking Engine Oil
You do not need many tools for checking oil level. In most cases, you only need a clean rag, cloth, or paper towel. This helps you wipe the dipstick before taking a proper reading.
If your car needs oil, you may also need a funnel, gloves, and the correct bottle of motor oil. A funnel helps prevent oil spills around the oil filler cap and engine bay. Gloves can protect your hands from dirt, oil, and hot components.
The most important “tool” is your owner’s manual. Your vehicle’s manual tells you the correct oil viscosity, oil grade, and manufacturer-approved specification. Some cars require 0W-20, others may use 5W-30, and some engines need a different grade entirely. Do not guess based only on what another car uses. The correct oil depends on the vehicle make and model, engine type, climate, and manufacturer’s recommendations.
How to Check Engine Oil Step by Step
Learning how to check engine oil is simple once you know the right order. The goal is to get an accurate oil dipstick reading and avoid common mistakes like checking on a slope or reading the dipstick before wiping it.
-
Park on Level Ground
Always park your car on level ground before checking the oil. If the car is parked on a hill or uneven driveway, the oil inside the oil pan may shift to one side. This can create a false oil dipstick reading, making the oil look higher or lower than it really is.
Put the car in park, apply the parking brake, and make sure the vehicle is stable. If you drive a stick-shift car, leave it in gear according to safe parking practice.
-
Turn Off the Engine and Wait
You should usually check oil with the engine turned off, not while the car is running. If the engine has just been driven, wait a few minutes so the oil can drain back into the oil pan. Many drivers wait around 10–15 minutes after driving for a more stable reading.
This also protects you from hot components in the engine bay. Engine parts can become very hot after driving, so avoid touching anything except the dipstick handle and oil filler cap.
-
Open the Hood and Find the Dipstick
Open the hood and look for the oil dipstick. It often has a yellow, orange, or red handle, but the exact design varies. The dipstick usually sits near the engine and slides into a narrow dipstick tube.
Some vehicles have a label or small oil-can symbol near the dipstick. If you cannot find it, check the vehicle owner’s manual. Do not confuse the engine oil dipstick with the transmission dipstick if your vehicle has one.
-
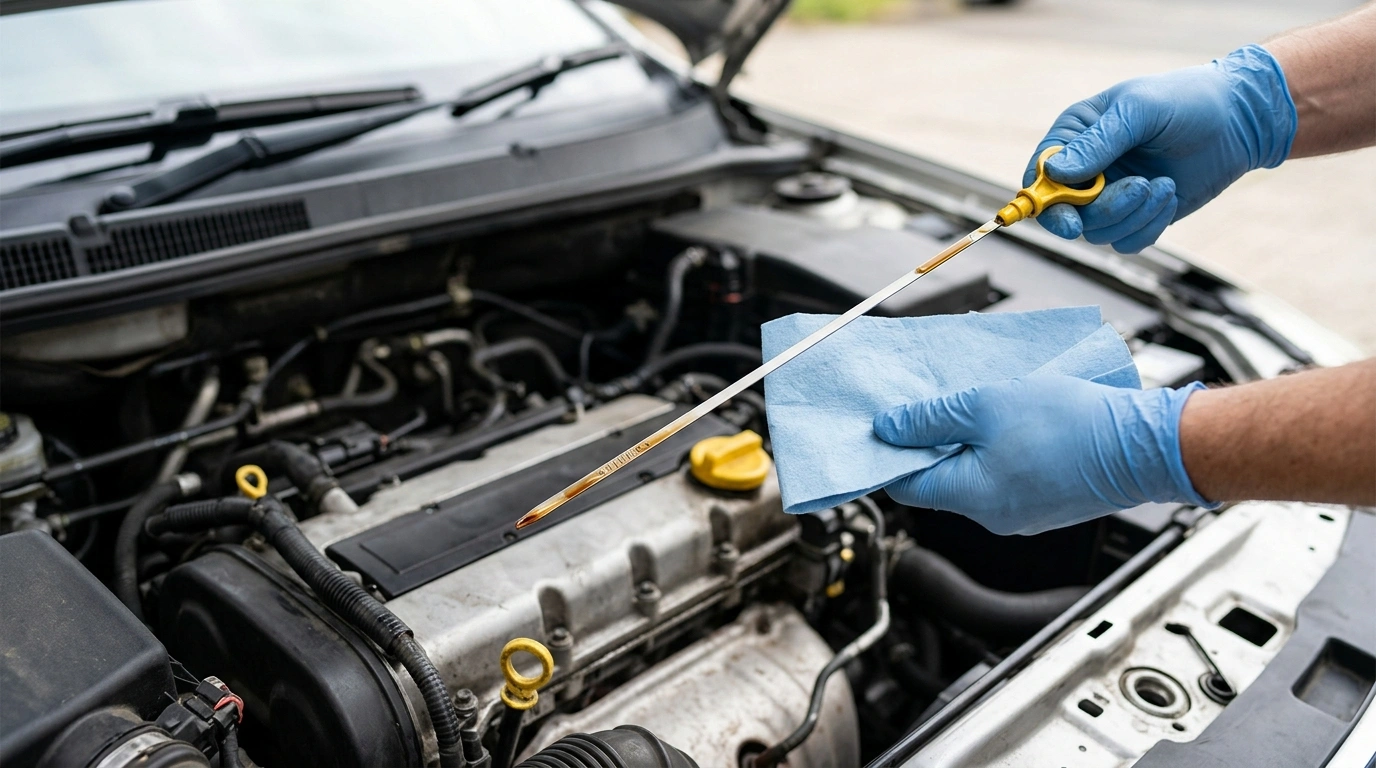
Pull Out the Dipstick and Wipe It Clean
Pull the dipstick out carefully. The first reading is not always accurate because oil can splash inside the tube while the engine runs. Use a clean rag or paper towel to wipe the dipstick from top to bottom.
This step is important. If you skip it, you may read old oil streaks instead of the true engine oil level.
-
Reinsert the Dipstick Fully
After wiping it clean, push the dipstick all the way back into the tube. Make sure it is fully seated. If the dipstick is not pushed in completely, the reading may be too low or uneven.
Wait a second, then pull it back out again while keeping the tip pointed downward.
-
Read the Oil Level
Look at the end of the dipstick. Most dipsticks have a MIN mark, MAX mark, low and high marks, two pinholes, or a crosshatched area. The proper oil level is usually between the low and high marks.
Here is a simple guide:
| Dipstick Reading | What It Means | What to Do |
| Below MIN | Oil is low | Add oil carefully |
| Between marks | Usually normal | No oil needed |
| Above MAX | Too much oil may be present | Do not add more |
| No oil visible | Dangerously low oil possible | Avoid driving and inspect |
If the oil streak sits between the minimum and maximum marks, your oil level is usually okay. If it is near or below the low mark, add oil slowly.
-
Check Oil Color and Texture
While the dipstick is out, look at the oil color and consistency. Fresh oil is often amber or golden. Used oil may be brown or dark brown, which can be normal. However, milky oil, gritty oil, metal shavings, or a burnt smell can signal a problem.
Oil naturally darkens as it collects combustion by-products, heat, and debris. But if the texture looks thick, sludgy, foamy, or contaminated, the vehicle may need an oil change or professional inspection.
-
Add Oil Only If Needed
If the oil level is low, remove the oil filler cap and add oil slowly. Use a funnel to reduce spills. Start with a small amount, such as half a quart or about 16 ounces, then wait and recheck the dipstick.
Never pour in a full bottle without checking. Too much oil can be harmful, just like too little oil.
Should You Check Oil Hot or Cold?
One of the most common questions is: should you check oil when engine is warm or cold? The safest answer is to follow your owner’s manual, because different vehicles may have different instructions.
For many cars, a cold engine gives a stable and safe reading because the oil has had enough time to settle in the oil pan. A warm engine can also give a useful reading if you turn the engine off and wait several minutes. Many drivers wait 10–15 minutes after driving before checking.
Do not check oil while the engine is running unless your owner’s manual specifically says otherwise. For most passenger vehicles, the engine should be off. This helps you avoid moving parts, hot surfaces, and an inaccurate reading.
If your vehicle has a digital oil monitor or electronic oil sensor, it may require the engine to be warm or the car to be parked in a specific way before showing a reading. Always follow the dashboard instructions or the manual.
How to Read the Oil Dipstick Correctly
Knowing how to read the dipstick is just as important as pulling it out. Dipsticks are not all designed the same way. Some have MIN and MAX labels. Others use two pinholes, an L and H, or a crosshatched area.
In most cases, the oil should land between the two marks. If it is near the middle, the level is usually fine. If it is close to the lower mark, you may need to add a small amount. If it is below the lower mark, the oil is low and should be topped up carefully.
Sometimes oil appears on one side of the dipstick but not the other. In that case, wipe it again, reinsert it fully, and check once more. Read the cleaner, more consistent oil line. If the reading is still unclear, repeat the process.
A normal reading should show a clear oil streak between the safe marks. A messy streak, bubbles, or oil smeared far above the mark may mean the dipstick was not wiped properly, the car is not level, or the oil is foaming.
What Should Engine Oil Look Like?
Many people ask, what color should engine oil be? The answer depends on the age of the oil, the engine, and driving conditions.
Fresh engine oil is usually amber, honey-colored, or golden. After use, it often turns brown or dark brown. Dark oil does not always mean something is wrong. Oil is designed to collect dirt, heat residue, and combustion by-products as it protects the engine.
However, some oil appearances need attention:
| Oil Appearance | Possible Meaning |
| Amber or golden | Fresh or clean oil |
| Brown or dark brown | Often normal used oil |
| Black and thick | May be old or dirty oil |
| Milky or creamy | Possible coolant contamination |
| Gritty or metallic | Possible debris or engine wear |
| Foamy or bubbly | Possible overfilling or aeration |
| Burnt smell | Possible overheating or old oil |
If the oil looks milky, do not ignore it. Milky oil can sometimes mean coolant is mixing with the oil, which may require a mechanic. If you see metal shavings, the engine may have internal wear. If the oil smells burnt, your car may need an oil change or inspection.
What to Do If Your Oil Is Low
If the dipstick shows low oil, do not panic, but do act carefully. Low oil means the engine may not have enough lubrication to protect its moving parts. If you keep driving with very low oil, the engine can overheat, wear faster, or suffer serious damage.
First, check your owner’s manual for the correct oil grade. Common grades include 0W-20 and 5W-30, but you should not assume either one is right for your vehicle. Look for the oil specification recommended by the manufacturer.
Next, remove the oil filler cap. It is usually on top of the engine and may have an oil-can symbol. Place a funnel into the opening and add a small amount of oil. Starting with half a quart is usually safer than adding too much at once.
After adding oil, wait a minute, then check the dipstick again. Keep adding small amounts until the oil sits between the MIN and MAX marks. When finished, tighten the oil filler cap securely and wipe away any spills.
If the oil level keeps dropping after you top it up, your car may have an oil leak or may be burning oil.
What If There Is No Oil on the Dipstick?
If there is no oil on the dipstick, your engine may be dangerously low on oil. This is more serious than a slightly low reading.
First, make sure you checked correctly. Park on level ground, wipe the dipstick, reinsert it fully, and check again. If there is still no oil visible, avoid driving until the oil level is corrected. Driving with extremely low oil can lead to engine damage, overheating, knocking sounds, or catastrophic engine failure.
If the oil warning light is on, treat it seriously. An oil light may indicate low oil pressure, not just low oil level. Low oil pressure can damage an engine quickly. Add the correct oil if needed, but if the warning light stays on, contact a trained technician or service center.
What If There Is Too Much Oil in the Engine?
More oil is not better. If the oil level is above the MAX mark, the engine may be overfilled. Too much oil can cause foaming, pressure problems, leaks, smoke, or poor engine performance.
Signs of overfilled engine oil may include bubbles on the dipstick, foamy oil, burning smells, oil leaks, rough running, or smoke from the exhaust. If you accidentally added too much oil, do not continue adding more. The extra oil may need to be drained.
If the reading is only slightly above the maximum mark, recheck it after the car sits level for several minutes. If it remains high, get help from a mechanic or service center.
Oil Top-Up vs. Oil Change: Which Do You Need?
An oil top-up and an oil change are not the same thing. Topping up means adding new oil to raise a low oil level. An oil change means draining the old oil and usually replacing the oil filter.
Topping up may be enough if the oil is low but still looks clean and the car is not due for service. However, topping up does not remove dirty oil, sludge, debris, or an old filter.
| Situation | Top-Up Enough? | Oil Change Needed? |
| Oil is slightly low but clean | Yes | Not always |
| Oil is dirty or gritty | No | Yes |
| Oil is milky | No | Inspection needed |
| Oil is past service interval | No | Yes |
| Oil level keeps dropping | No | Leak/burning oil check needed |
Follow your vehicle’s service intervals and manufacturer guidance. If your oil is old, dirty, or contaminated, a full oil-and-filter change is the better choice.
How Often Should You Check Your Oil?
A good habit is to check your oil level about once a month. You should also check before a long trip, before towing, after buying a used car, or when you notice an oil warning message.
Older cars and high-mileage cars may need more frequent checks. Vehicles with more than 100,000 miles can sometimes consume oil faster because of worn engine parts. Driving habits matter too. Stop-and-go traffic, hot weather, heavy loads, and long highway trips can all affect oil use.
Even if your car has a digital oil monitor, it is still smart to understand how your oil system works. A dashboard alert is helpful, but routine checks can help you catch problems earlier.
How to Check Oil in a Car Without a Dipstick
Some newer cars do not have a traditional oil dipstick. Instead, they use digital oil sensors, an electronic oil monitor, or a dashboard oil level display. You may need to check the oil through the digital instrument cluster or center screen.
The process varies by vehicle. Some cars require the engine to be warm. Others require the car to be parked on level ground with the engine running or off. Because the steps are vehicle-specific, the owner’s manual is the best guide.
If your car has no dipstick and the dashboard shows low oil, do not ignore the message. Use the recommended oil type and follow the vehicle’s instructions, or visit a service center if you are unsure.
Common Mistakes When Checking Engine Oil
Many oil-checking mistakes are simple but can lead to wrong readings. One common mistake is checking the oil while parked on a slope. This can make the oil appear too high or too low.
Another mistake is reading the dipstick without wiping it first. The first pull can show oil splashed inside the dipstick tube, not the true level. You should always wipe, reinsert, and check again.
Drivers also make the mistake of not pushing the dipstick fully back into place. If it is not fully seated, the reading may be inaccurate. Some people add too much oil at once, which can lead to overfilling. Others use the wrong oil grade because they do not check the owner’s manual.
Avoid these common errors:
- Checking while the engine is running
- Checking on uneven ground
- Not wiping the dipstick first
- Not reinserting the dipstick fully
- Adding too much oil
- Using the wrong oil viscosity
- Ignoring milky, gritty, or burnt-smelling oil
- Confusing the oil filler cap with another cap
A careful check only takes a few minutes, but accuracy matters.
Warning Signs You Should Not Ignore
Sometimes checking oil reveals a bigger problem. If your oil warning light stays on, the oil level keeps dropping, or you see oil under the car, do not ignore it.
Warning signs include a burning oil smell, smoke from the exhaust, engine ticking, knocking sounds, overheating, or sudden loss of performance. If the oil looks milky, gritty, or metallic, the engine may need professional attention.
A small top-up may fix a slightly low oil level, but it will not fix leaks, worn parts, coolant contamination, or low oil pressure. If you are unsure, contact a trained technician, mechanic, or service center. Acting early can prevent costly repairs.
Seasonal and Driving-Condition Oil Check Tips
Oil checks are especially useful before road trips, during extreme weather, and after heavy driving. In hot weather, engines work harder and oil can break down faster. In cold weather, oil thickness and oil viscosity matter because cold starts can be harder on the engine.
If you tow, drive in mountains, sit in stop-and-go city traffic, or make frequent short trips, your car may need closer attention. These driving conditions can affect oil life and engine stress.
Before a long drive, take a few minutes to check the oil, coolant, tire pressure, and other fluid levels. This simple habit can reduce the chance of breakdowns and help your engine run smoothly.
FAQs About Checking Car Oil
Do you check oil with the car on or off?
In most vehicles, you check oil with the engine off. Park on level ground, turn off the engine, wait a few minutes, and then check the dipstick. Always follow the owner’s manual if your vehicle has special instructions.
Should oil be checked hot or cold?
Oil can often be checked cold or after the engine has been turned off for several minutes. If the engine is hot, wait about 10–15 minutes after driving so oil can settle and hot parts can cool slightly.
How often should you check your oil?
A good rule is to check oil once a month and before long trips. Older cars, high-mileage vehicles, and cars that burn or leak oil may need more frequent checks.
Can I use any 5W-30 oil in my car?
Not always. Even if your car uses 5W-30, it may require a specific oil specification. Check the owner’s manual for the recommended oil viscosity and standard, such as an API or manufacturer-specific requirement.
Is topping up oil the same as an oil change?
No. Topping up adds oil to bring the level back into the safe range. An oil change removes old oil and usually replaces the oil filter. If the oil is dirty, gritty, or past its service interval, an oil change is needed.
Do electric cars need engine oil?
Fully electric vehicles do not use traditional engine oil because they do not have a gas or diesel internal combustion engine. However, they still have other fluids and maintenance needs. Hybrid vehicles usually do have engine oil because they still use an engine.
Conclusion: Checking Oil Is Simple but Important
Now you know how do you check the oil the right way: park on level ground, turn the engine off, use the oil dipstick, read between the marks, inspect the oil condition, and add the correct motor oil only when needed.
Checking oil is a small part of preventive maintenance, but it can protect your engine from low oil, overheating, wear, and expensive repairs. Make it a monthly habit, check before long trips, and always follow your owner’s manual for the correct oil grade and vehicle-specific instructions.
This article is for general informational purposes only and does not replace advice from a qualified mechanic or your vehicle’s owner’s manual. Car models and engine types vary — always refer to your manufacturer’s guidelines for oil specifications and maintenance schedules.